
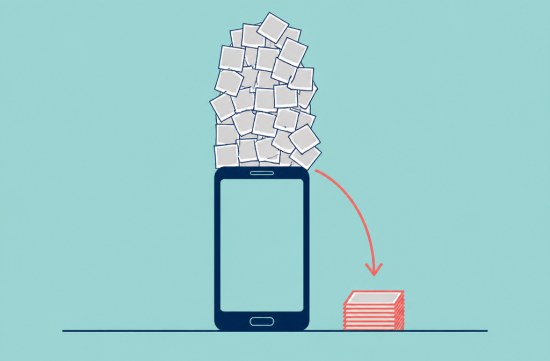
Last month, I kept getting notifications on my phone saying, "Storage space is almost full" several times a day. When I opened the photo app, I found over 20,000 photos piled up.
Scrolling down was quite a sight. There were twelve brunch photos taken from the same angle, screenshots of receipts, and pictures of my parking location all still there.
So, I cleared my entire weekend to tackle the organization. To cut to the chase, it is possible to do it all at once. However, the order of operations is important.
The first thing to do is not to delete but to back up. While organizing, you can get quick with your hands and accidentally delete photos you meant to keep.
The free iCloud storage for iPhones is only 5GB. With 20,000 photos, that fills up quickly.
Apple's paid plans in the U.S. are $0.99 per month for 50GB, $2.99 for 200GB, and $9.99 for 2TB. It's a bit disappointing that there are no annual discounts.
Google Photos offers 15GB for free, but this is shared with Gmail and Google Drive. If your email inbox is heavy, you might find you have less space for photos than you think.
The Google One 100GB plan costs $1.99 per month or $19.99 if paid annually. I found this to be a decent value for just storing photos.
Before you start, check your current storage. On an iPhone, you can see how much space the photo app is using by going to Settings, then General, and tapping on iPhone Storage.
Jotting down this number can be fun to compare later. I took a screenshot of the number before starting, and that turned out to be the only screenshot that survived today.
Once the backup is done, it's time to really start organizing. The first target is duplicate photos. This is where the numbers drop the most.
Starting from iOS 16.1, the photo app on iPhones has a duplicate items album. It's located in the Utilities section, and by tapping Merge, it keeps only the highest quality photo.
The remaining copies go to Recently Deleted. When you first update, this album might not be visible right away, but Apple advises that if you plug your phone into a charger and leave it overnight, the analysis will proceed.
I managed to reduce quite a bit at this stage. Photos I saved multiple times from KakaoTalk all ended up here.
The second step is screenshots. On the iPhone, screenshots are grouped separately by media type, so you can scroll through and select them all at once.
Honestly, most of my screenshots were things I wouldn't need to look at again. Coupon codes, shipping tracking, map captures, that sort of thing. I moved only the truly necessary ones to the Notes app and boldly deleted the rest.
The third step is videos. While they may not take up a lot of space in terms of quantity, videos often consume a lot of storage.
Especially 4K videos can be much larger than a single photo after just a few minutes. Deleting long, shaky videos or those accidentally recorded in my pocket makes a noticeable difference.
The fourth step, which takes the most time, is selecting similar photos taken in burst mode. It's good to set a rule here.
I decided on "only keep one photo of the same scene." If I spent more than three seconds deciding, I just kept the first one. Otherwise, it would take not just a weekend but a month.
If you use Google Photos, there's a feature that allows you to delete photos from your phone to free up space while keeping them in the cloud. This is convenient when you need to free up phone storage quickly.
One important thing to know is the trash period. On iPhones, items in Recently Deleted are kept for 30 days before being permanently deleted.
For Google Photos, backed-up photos stay in the trash for 60 days, while non-backed-up photos are kept for 30 days. If you remember something you deleted by mistake, you can retrieve it within this period.
So, I didn't empty the trash right after finishing the organization. I left it for about two weeks to see if I missed any important photos.
By the way, if you have a computer, I recommend making another copy on an external hard drive. It's more reassuring to have backups in two places rather than relying solely on the cloud.
Finally, I created a few albums for the remaining photos. Just a few for travel, family, and documents. If you divide them too finely, you end up not using them at all.
This is how I allocated my time: in the morning, I did backups and duplicate cleaning; after lunch, I tackled screenshots and videos; and in the late afternoon, I selected burst photos. Two cups of coffee were enough.
There's a debate about whether it's worth paying for cloud storage or just deleting photos. I understand the perspective that a few dollars a month feels wasteful, but it's also true that losing your phone means losing everything.
My opinion is to do both. First, organize to reduce storage, and then back up what's left, even if it's on the cheapest plan.
After organizing, I felt a bit lighter when opening the photo app. Good photos aren't buried under junk photos, so I find myself looking at them more often.
If you have time this weekend, at least open the duplicate items album. You might be surprised by the numbers you see.
 YamWeaponLab








 dermoon |
 hoosierdaddy |
 sun walker |
 Let's Be Like a Salt-like City Person |
 Springs Korea |
 Choco Choco Star |
 Conflite Teacher |
 U.S. Weather Bureau News |
  Exploring American Life Information |
 US Home Buying Information Home Insurance |
  Mental Health Psychiatrist |
  element |
  Koreab Date |
  CA Real Estate |
  yolanda78 |
  Round and Round Children's Song Kingdom |
  Mia Flori |
  nova nova |
  healthy |
  leaves |
  sparkling |
  maryland park |
  persiste |
  conte |
  blueman |
  Going Once |
  Eldorado 88 |
  cherrydino |
  garlic bread |